Written by LDS, Jan 2015
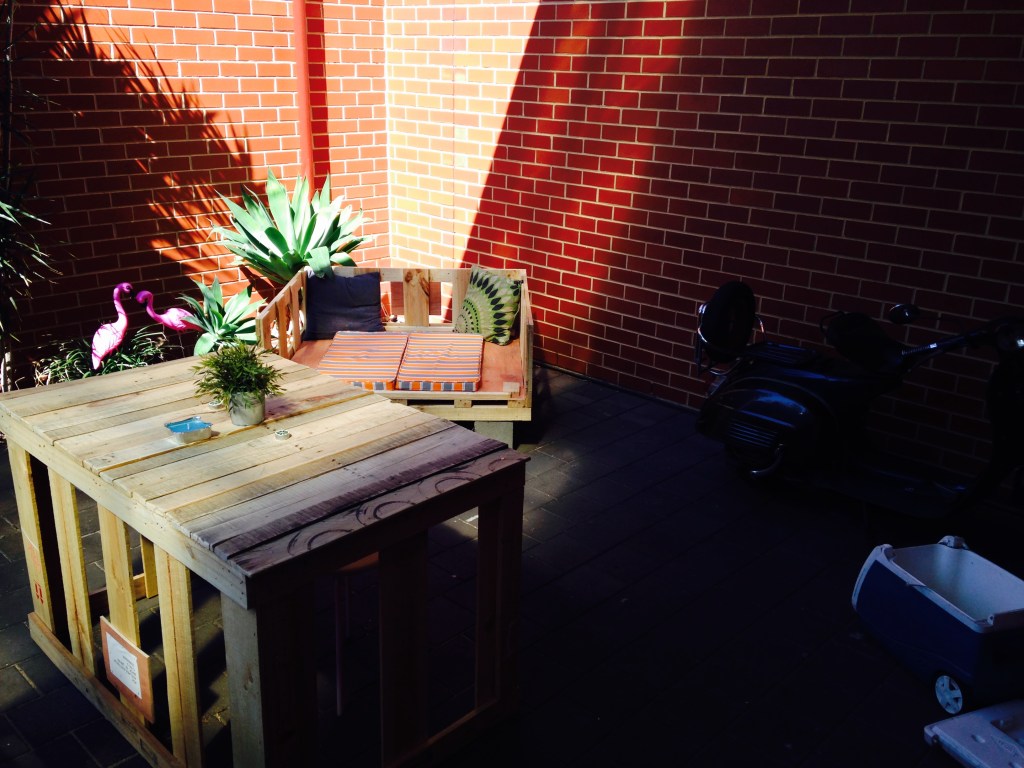
There’s really not many things you can’t make from old timber pallets, you are only limited by the depth of your imagination and not the depth of your pockets. The timber used for pallets varies so choose the quality to suit the desired purpose. This is a new hobby that my house-mate and I have personally journeyed on when we had to replace our outdoor furniture on a shoe-string budget and we’ve had a lot of fun with it.
The first and most important question is where do I get some timber pallets?
This took us a while to answer and even reaching out to our friends we struggled to get any fruitful suggestions. So as hilarious as it is to watch you balaclava’d up house-mate darting around trying to cram a pallet in the back of his car under the cover of dark, we thought we’d act in the good spirit of sharing and let you in on our resource pool. Frankly the best legitimate resource we have found is car mechanics; the larger the better! Often these places have parts delivered without the need to send the pallets back to the supplier which is the biggest knock-back you’ll encounter when sweet-talking any shop or warehouse to part with their timber-ware.
Our preference is to find some pallets with markings on them which really provide the end product with some character as lets face it we’re not making something that looks shop brought but something that has been lovingly recycled for a new purpose, but still wears scars of its previous life.
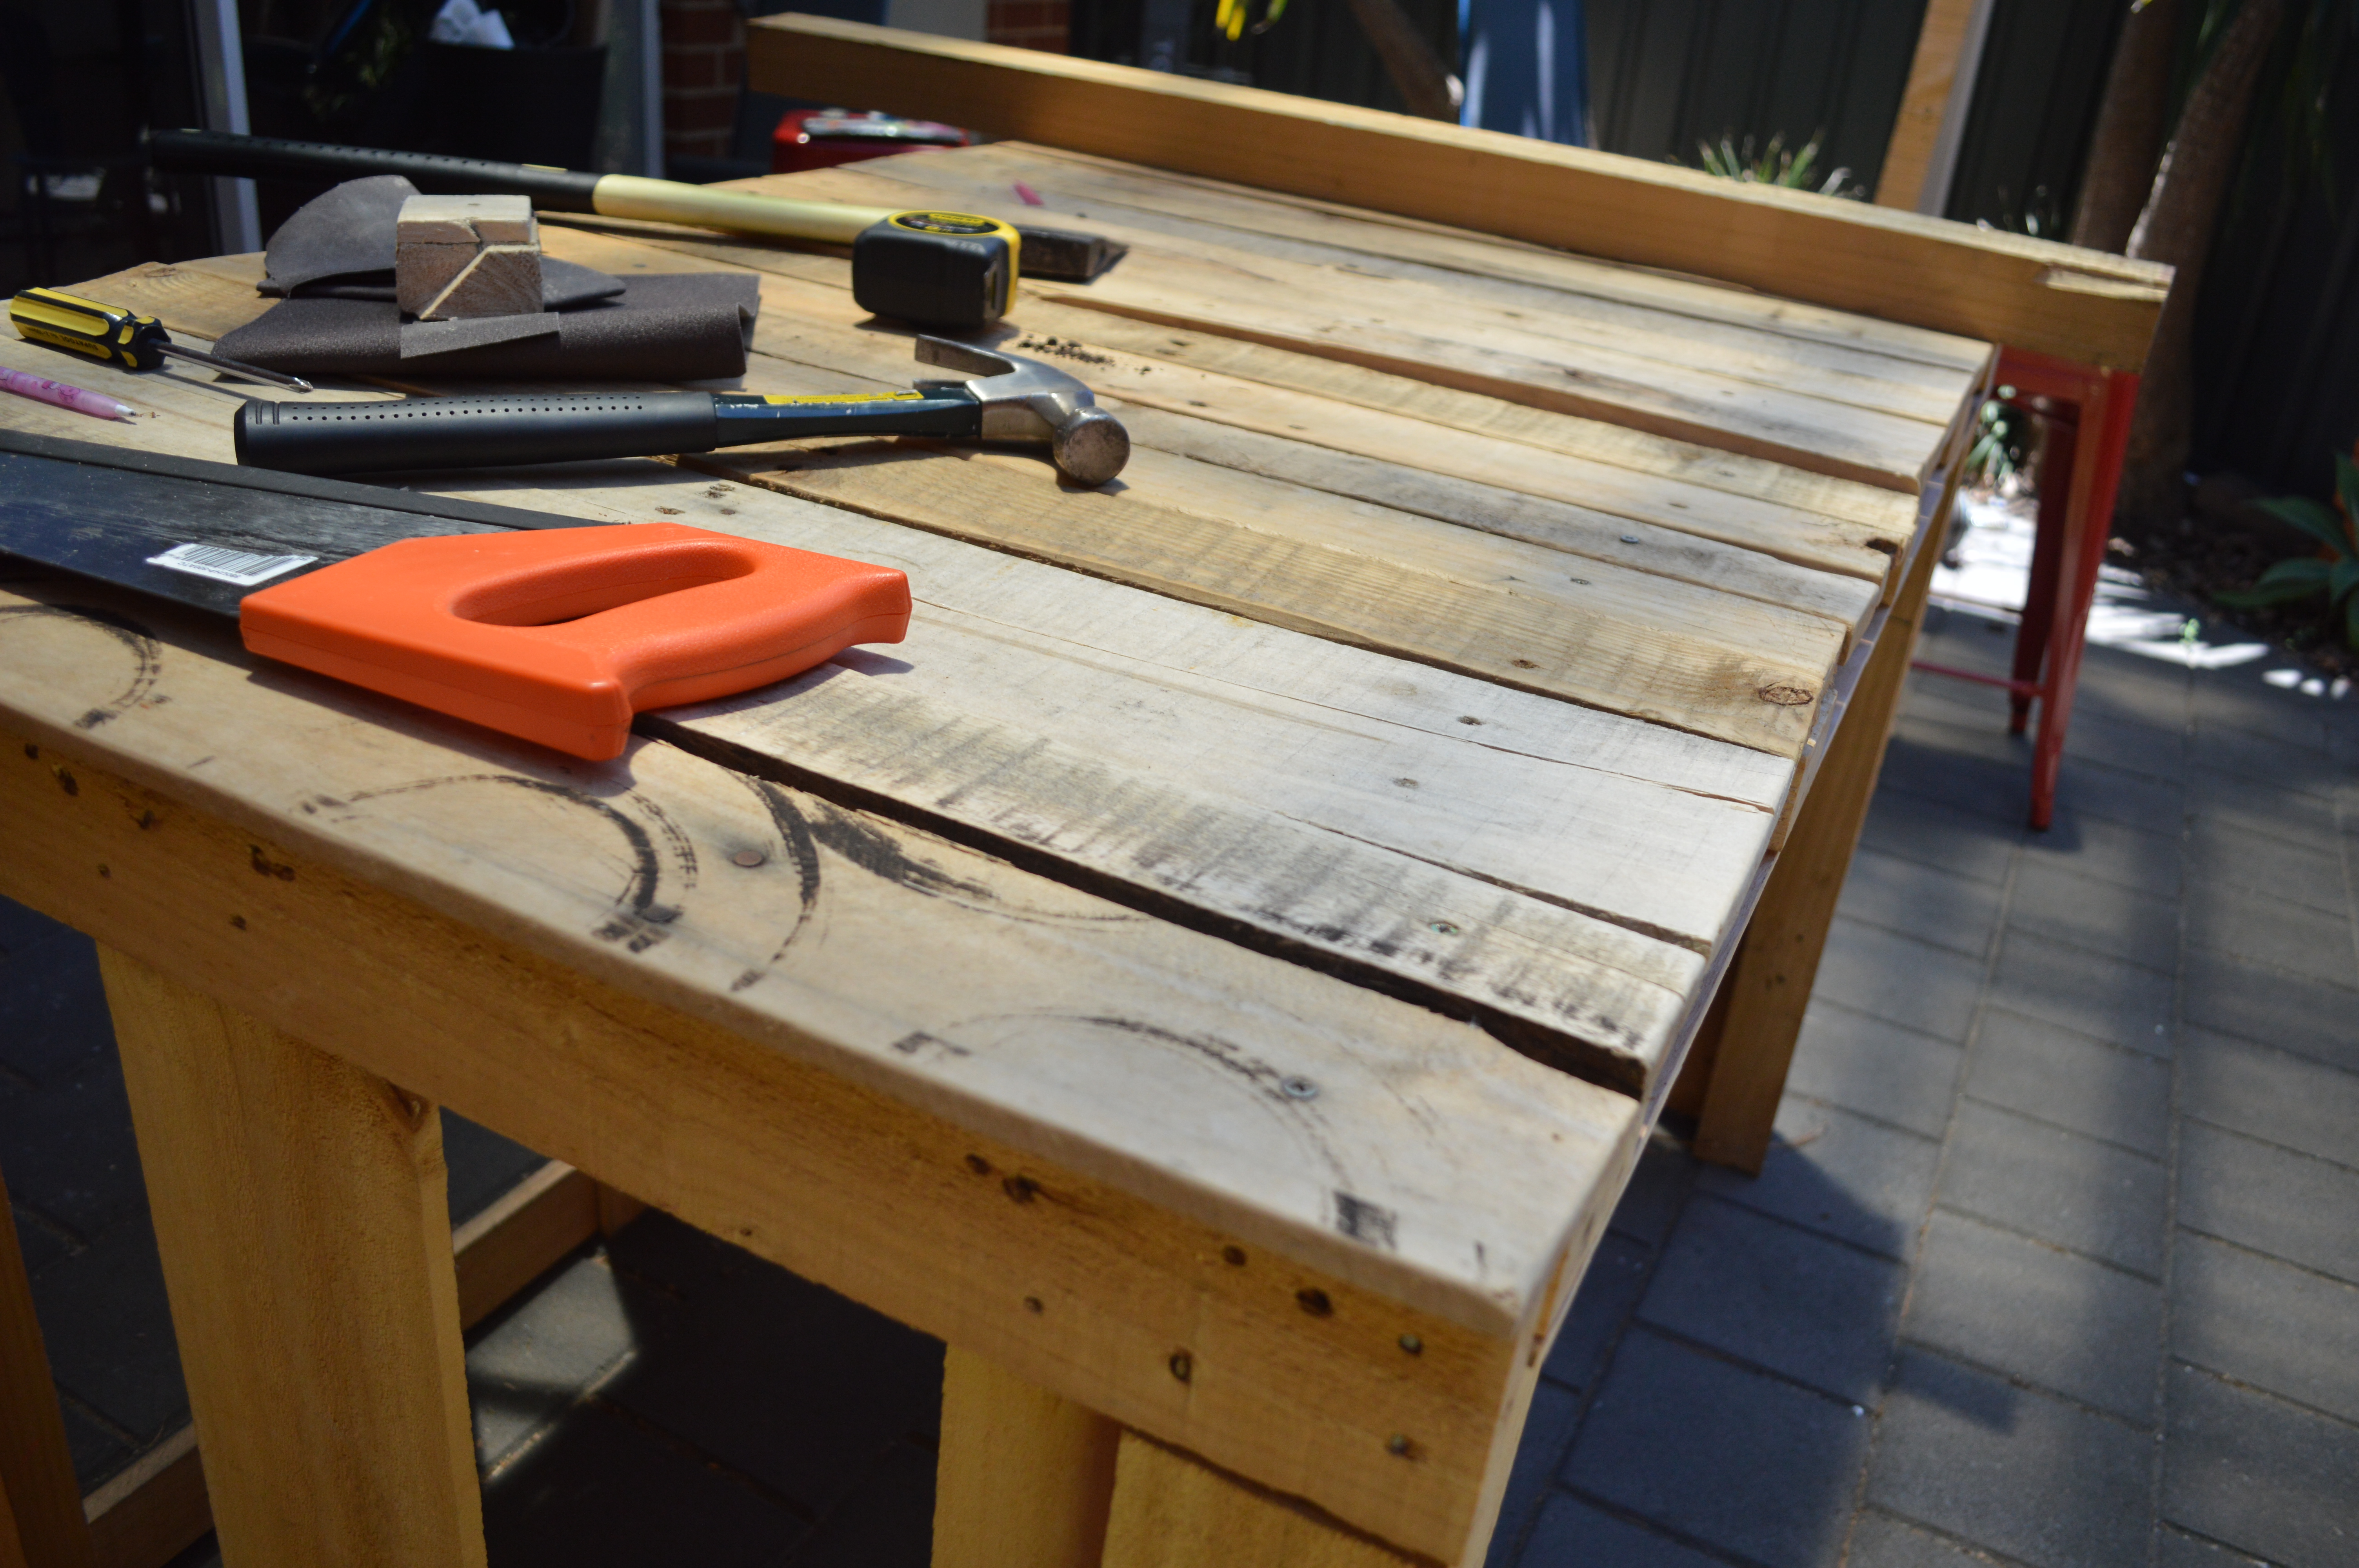
So the basic equipment you’ll need to begin your pallet project is as follows:
A tape measure and pencil – we’ll let you decide where the line lies between ‘practical’ and ‘rustic’.
A hammer – especially important when prising old pallets apart and useful for removing old nails.
A crow-bar – brilliant for prising the pallets apart – we didn’t have this luxury but a valuable investment.
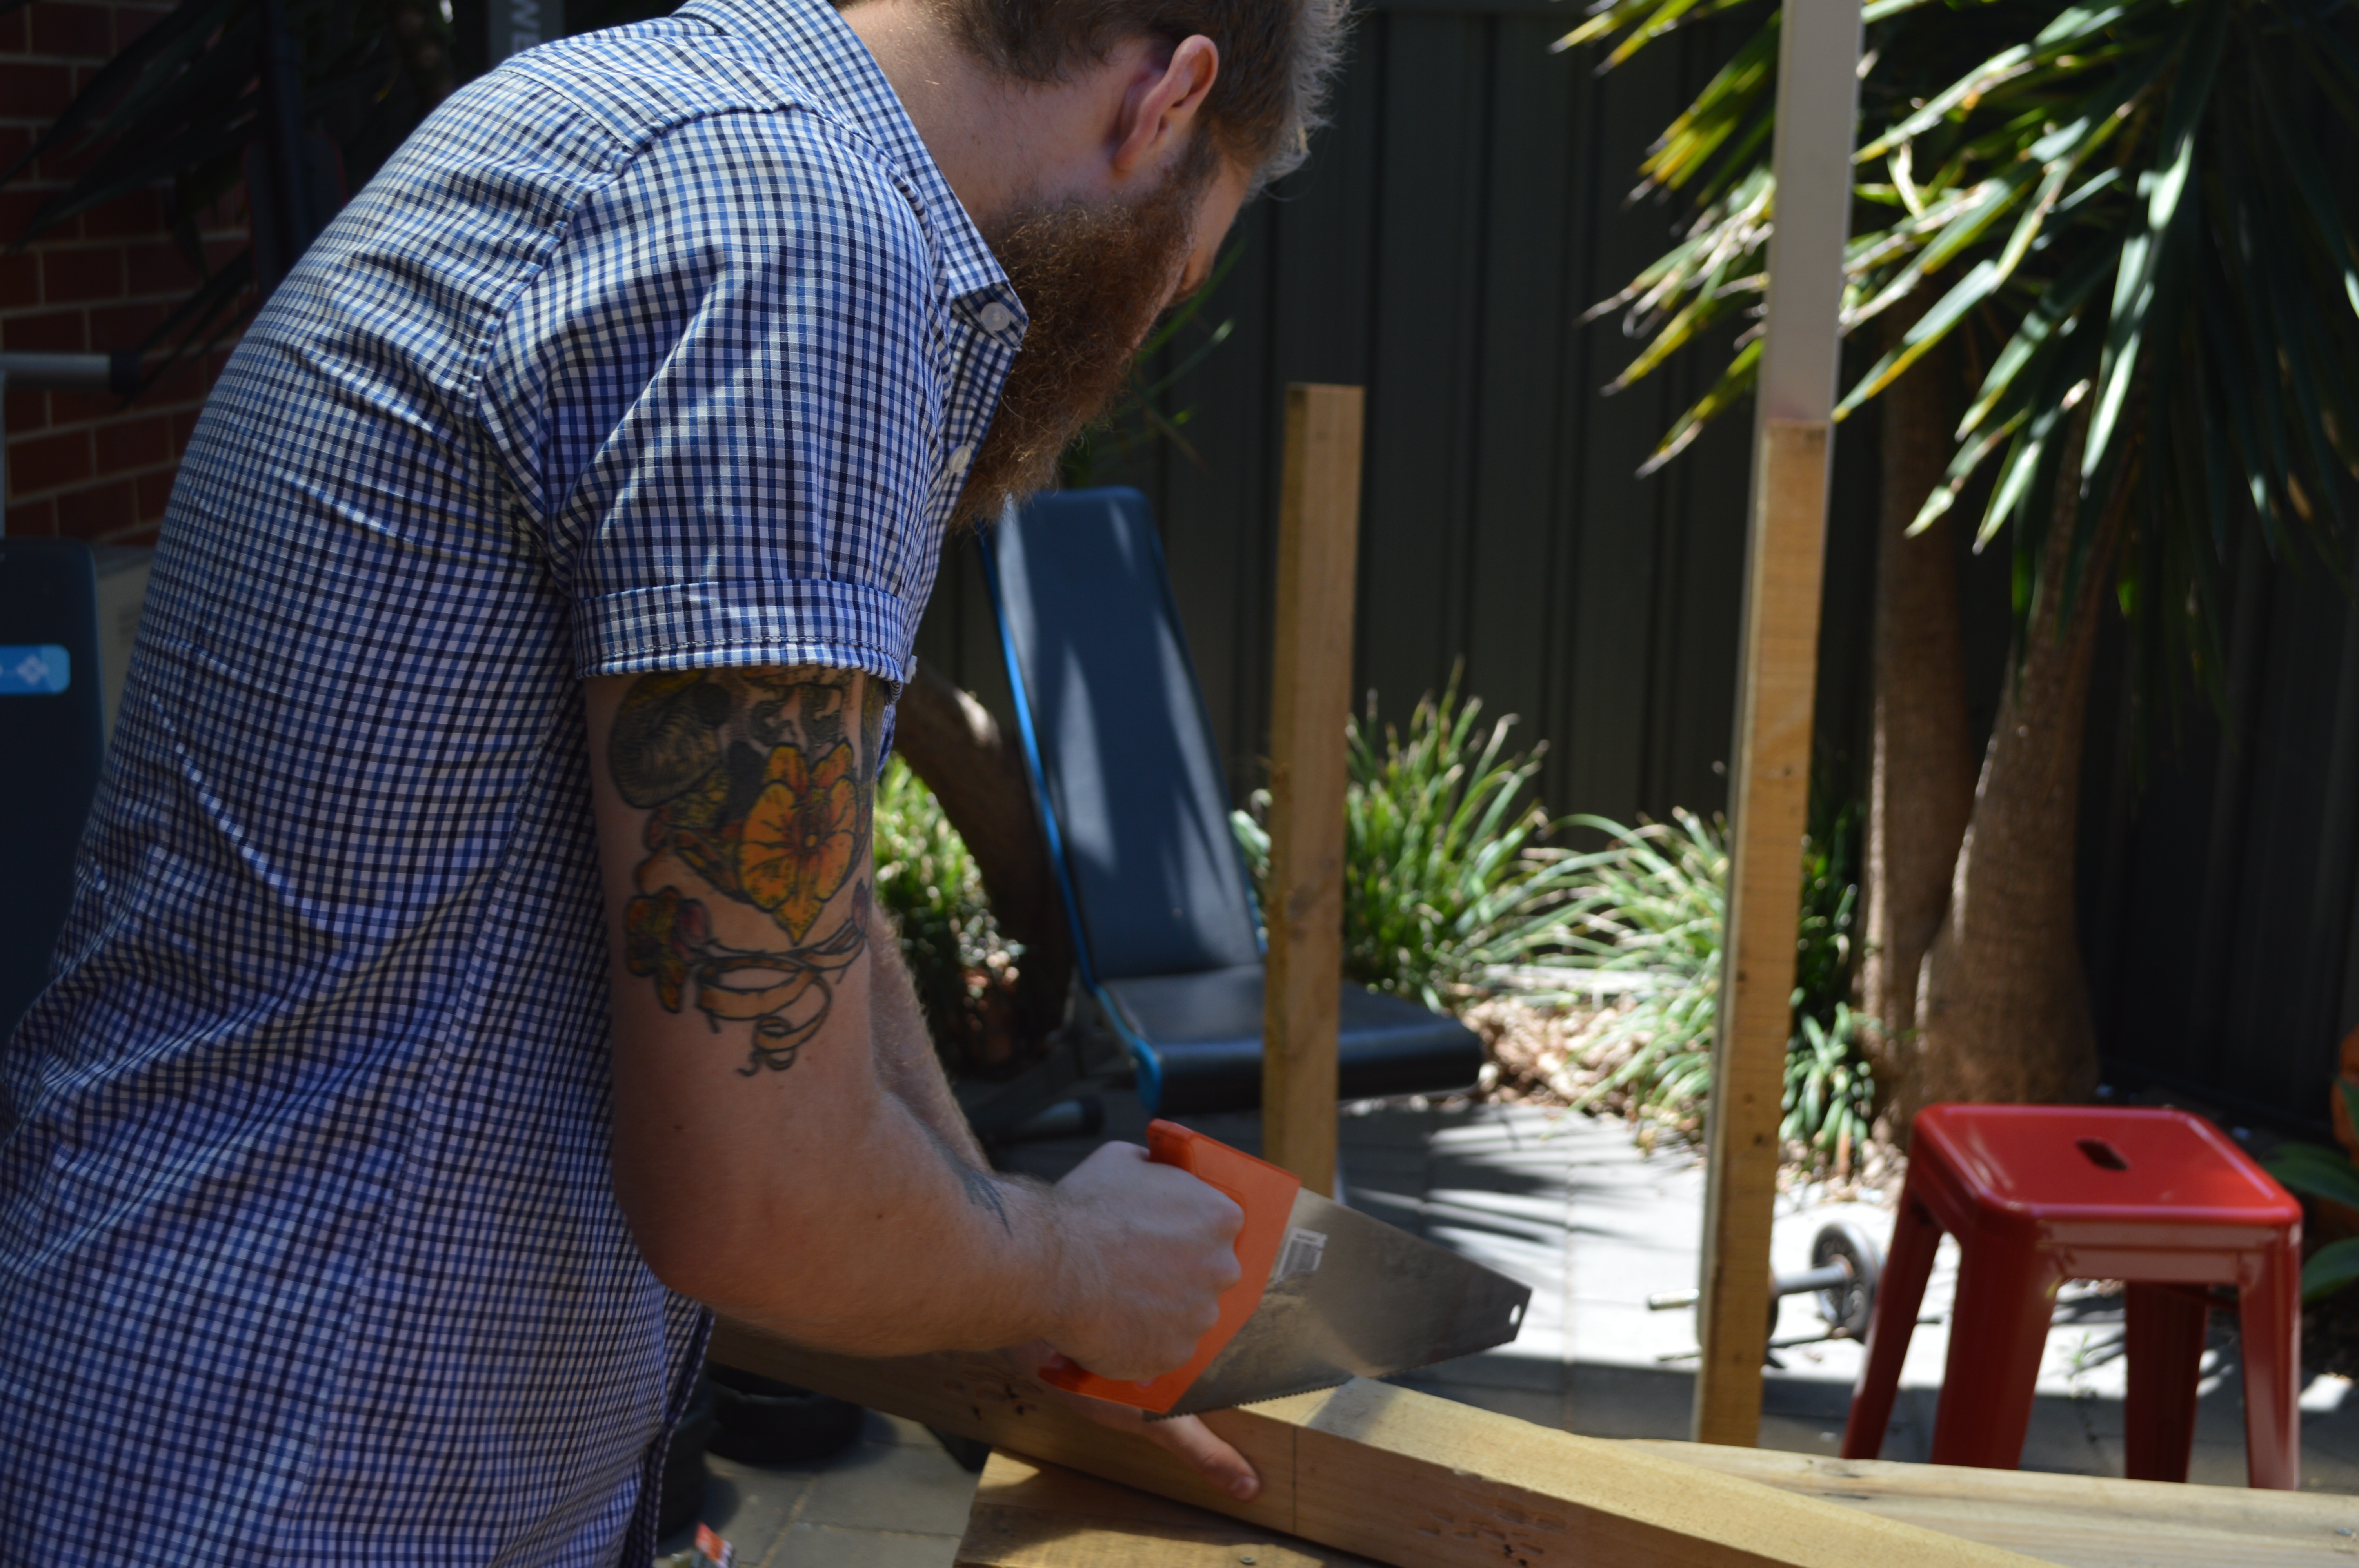
A saw – we use a hand-saw, its cheap and authentic but you’ll need some elbow-grease.
A drill and suitable screws – such as galvanised or stainless for outdoor furniture.
Sand paper – for a smooth finish!
Varnish
Inspiration anyone?
Now that we’ve got you interested, its time to start thinking what you might like to construct.
We’ve started planning the next addition to our garden which looks likely to be a raised planter bed or vertical garden with water-proof inner linings. Many people are now building coffee tables and indoor furniture by adding some rustic fixtures such as industrial castor wheels or salvaged hinges for added decoration. Check out the video below which does a great job in show-casing some projects completed by others….
Some lessons learnt…
Regardless of what you decide to build, you’ll need to first pull the old pallets apart which is best done by carefully prying them apart with a crow-bar being steady not to split the timber. Once you have salvaged a piece, knock the old nails through from the pointy side with a hammer and use the back of the hammer to pull them out from the flat side. Alternately if you have a multi-tool you can just saw through the nails at the joint – easy.

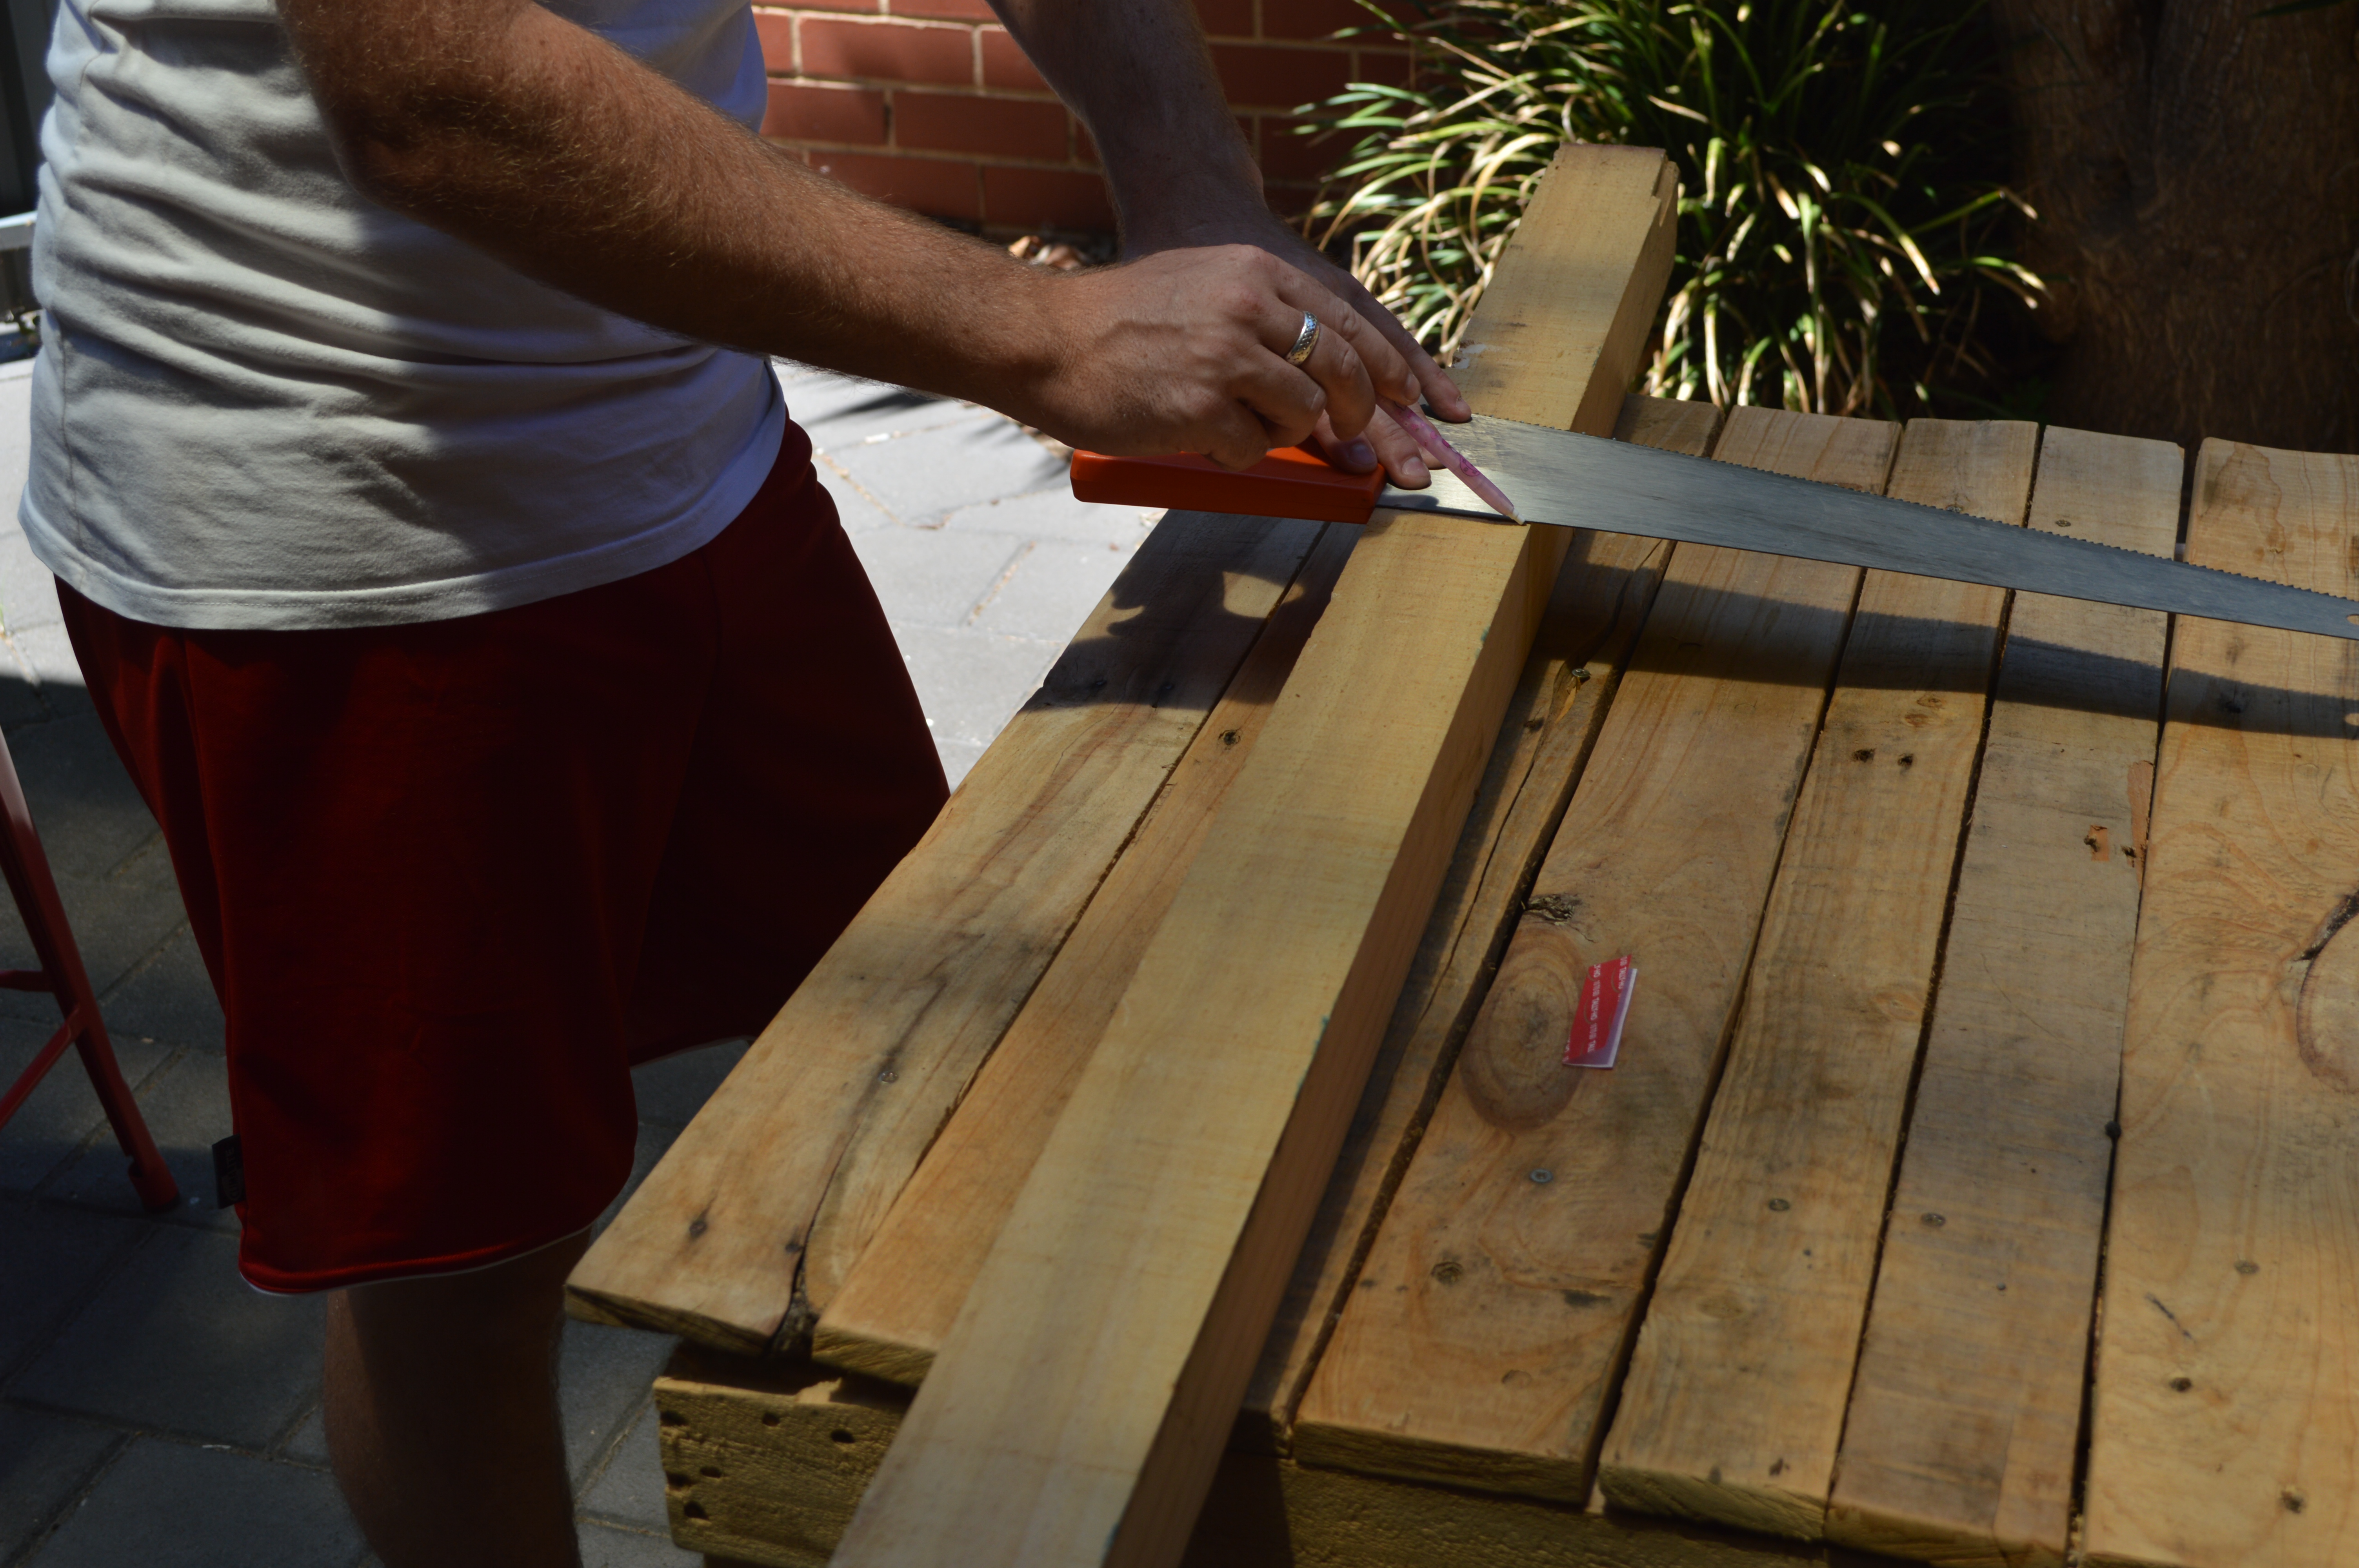
Where building a frame for your base it is essential to keep things as neat/straight as possible. A good tip to marking a straight line before cutting your timber is to mark your desired length with your tape and pencil, then taking the saw, push the handle edge flush to the timber (this forms a perfect right angle) and draw a line along the flat edge of the saw through your marker. Continue to do this on all sides and they should match perfectly with no need for a flat square (see photos above). This will provide a good guide to cut to, improving your chances of a neat job so long as you check the lines around your cut as you go.
It is best practise to use a good mechanical fixing in your project for a longer lifespan. Screws prevail over nails or wood-glue plus there are different types of screws which suit a number of applications. Differing heads – counter-sunk, domed etc can also add to your aesthetic. Before trying to ram a screw through a piece of timber, your drill will be much happier if you first drill a pilot hole using a standard timber drill bit of corresponding size, then screw the fixing through into place (much easier!).
HEALTH WARNING:
Always be aware of nails within the body of the timber pallets. It’s good practise to knock these out and place out of harms way otherwise knock/bend these down against the surface of the timber or lop off with a multi-tool and discard to avoid any injuries and emergency tetanus injections. Also to avoid being ‘stung’ by the timber our advise is suitable protective gloves and eyeware especially when de-constructing those old pallets as they tend to splinter.
So now you’re ready to embark on your new hobby and receive an array of compliments from your friends when they next pop past and put a beer down on your new rustic outdoor table. Good luck, but ultimately have fun with it…. We’d love to see what you’ve created by posting below or emailing the team at The Vintage
Here are a few other resources worth checking out:
